Most of the time the Dynamics GP application will be
installed on the server to help with administrative, maintenance, and
troubleshooting tasks. However, this is not a requirement as there is no
application server needed for Dynamics GP. If you have chosen not to
install the Dynamics GP application on the same server as SQL Server,
you can perform the first Dynamics GP installation on any computer on
your network.
The steps for installing
the Dynamics GP application are the same for server and client
installations. If you are used to installing prior Dynamics GP versions,
you will notice that there is no longer a choice for client or server
installations.
The following steps and
screenshots detail the steps for installing Dynamics GP 2010 on Windows
Server 2008, running SQL Server 2008. The media used for this
installation is the RTM GP 2010 download from PartnerSource or CustomerSource.
1. Start the Dynamics GP installation by running setup.exe.
2. If any required components are not found, the Microsoft Dynamics GP 2010 Bootstrapper Setup window will open, showing what components are missing:
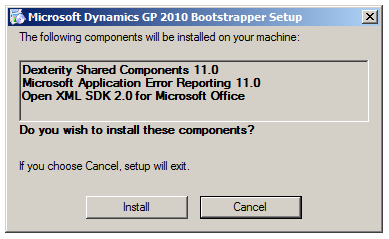
3. Select Install to install these components. Click Close once all the components have been installed.
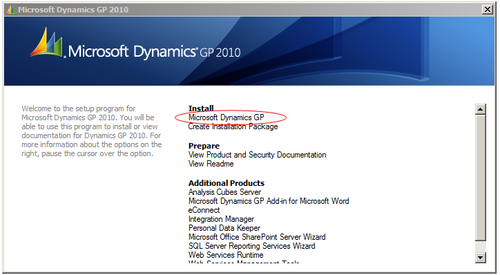
4. Select Microsoft Dynamics GP under the Install section:
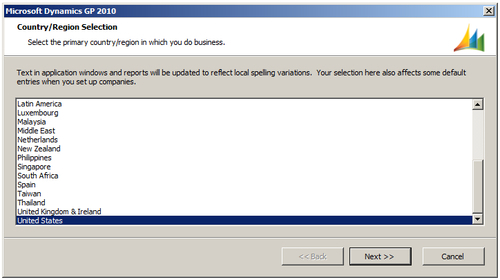
5. On the Country/Region Selection window choose the appropriate selection and click Next.
6. On the License Agreement window, read the license terms and, if you agree, select the I accept the terms in the License Agreement radio button, then click Next.
7. On the Select Features window select the options you want to install and the location for the installation:
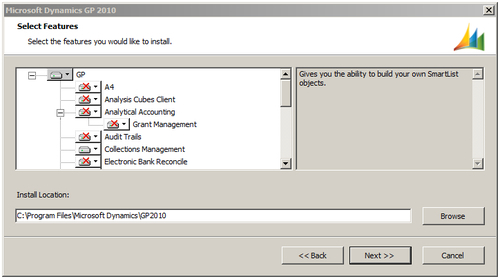
While it may be tempting
to simply select all the options, this is not recommended. Installing
modules you do not own, or will not use, may interfere with some
functionality for the modules you will use and will complicate service
packs and upgrades unnecessarily. If you are not certain, consult your
Dynamics GP resource on the components to select. As a general rule, it
is typically easier to install additional components later than remove
ones you do not need.
If
installing on Windows Vista or Windows 7, consider changing the Install
Location to outside of the Program Files directory. This is not a
requirement, but may help mitigate issues with the UAC on some networks.
We have seen Dynamics GP successfully implemented both inside and
outside of the Program Files directory.
Click Next to continue your installation.
8. The SQL Server window will offer to create the ODBC (Open Database Connectivity) data source for Dynamics GP. It is recommended not to have the installation create the data source for you. Select the Do not create a data source checkbox and click Next.
9. On the Install Program window click Install.
10. The Installation Progress window will open during the installation. Once it has finished, it will say Installation Complete. Click Exit.
Dynamics GP will check
the build number of the client application against the Dynamics GP SQL
Server database on every login, and will not allow logging into the
application if the versions are not the same. So, for example, if the
database has been upgraded to service pack 4, but the client computer
only has service pack 3 installed on it, Dynamics GP will not allow the
login from that client computer. Even if this were not the case, it is
critical to keep all installations of Dynamics GP on the same exact
build number, as there are often database and code changes in new
builds.